Creation of Additional Valuation Component for Capitalisation
Objective: Gain an understanding of how to create a Valuation Component against a Component for Capitalisation.
Prerequisites: This action requires some things to be completed prior to commencing. Asset Record must exist in the database. Component Record must exist in the database and have a Main record.
Capital Expenditure, or CapEx, is the amount of money spent to improve the condition of an Asset. This can be recorded against a component as either Fair Value or Historical Value, which are accessed via the Valuations tab.
How to Create a CapEx Record
Navigate to an Asset and select the component that requires a CapEx record.
Click on the Valuations, then select either Fair Value or Historical.
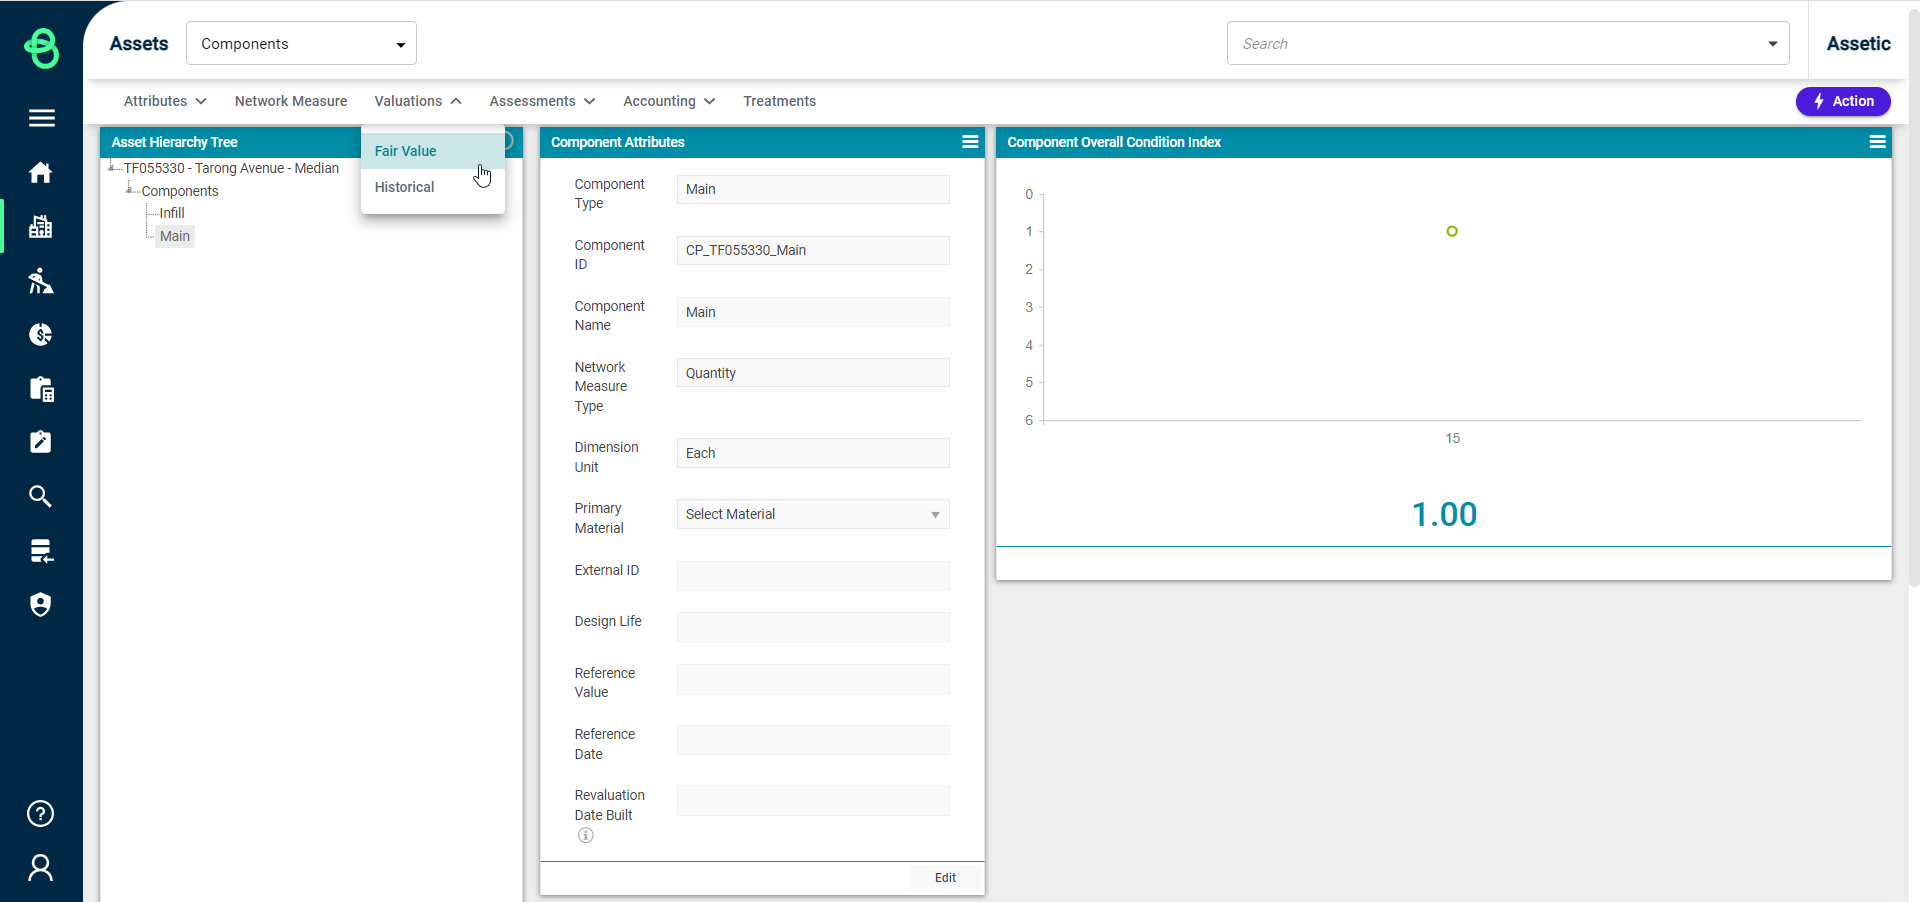
'Fair Value' has been selected in this example.
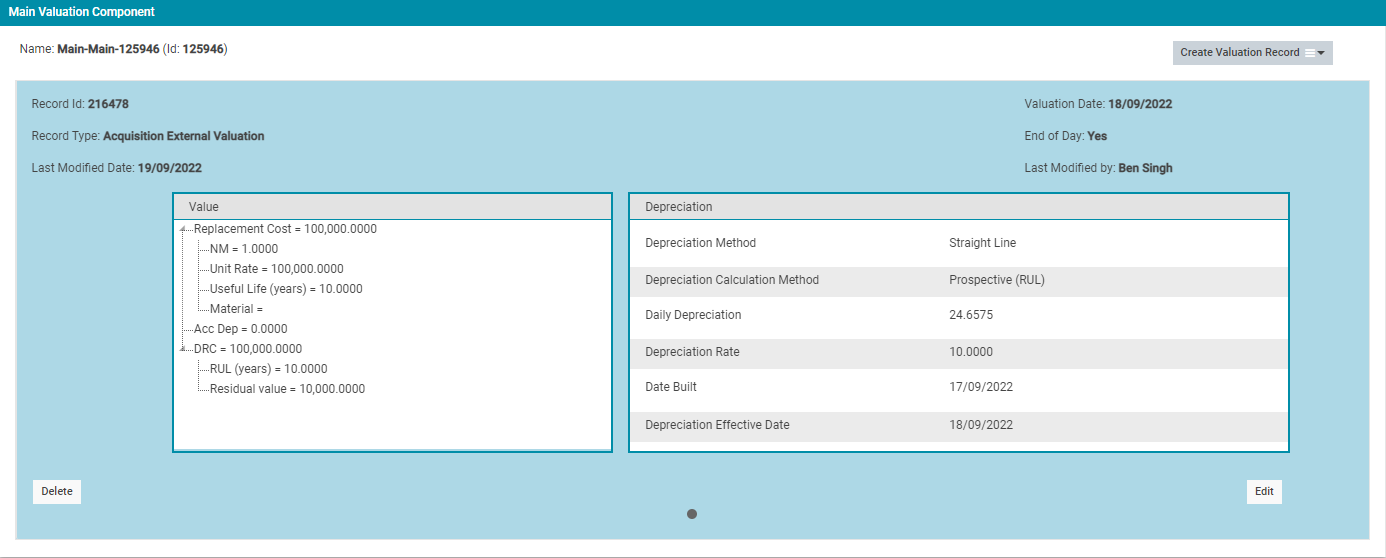
Since a CapEx record is only available after an Acquisition transaction has been executed on the Component, the first created Acquisition record is the 'Main' record as shown below:
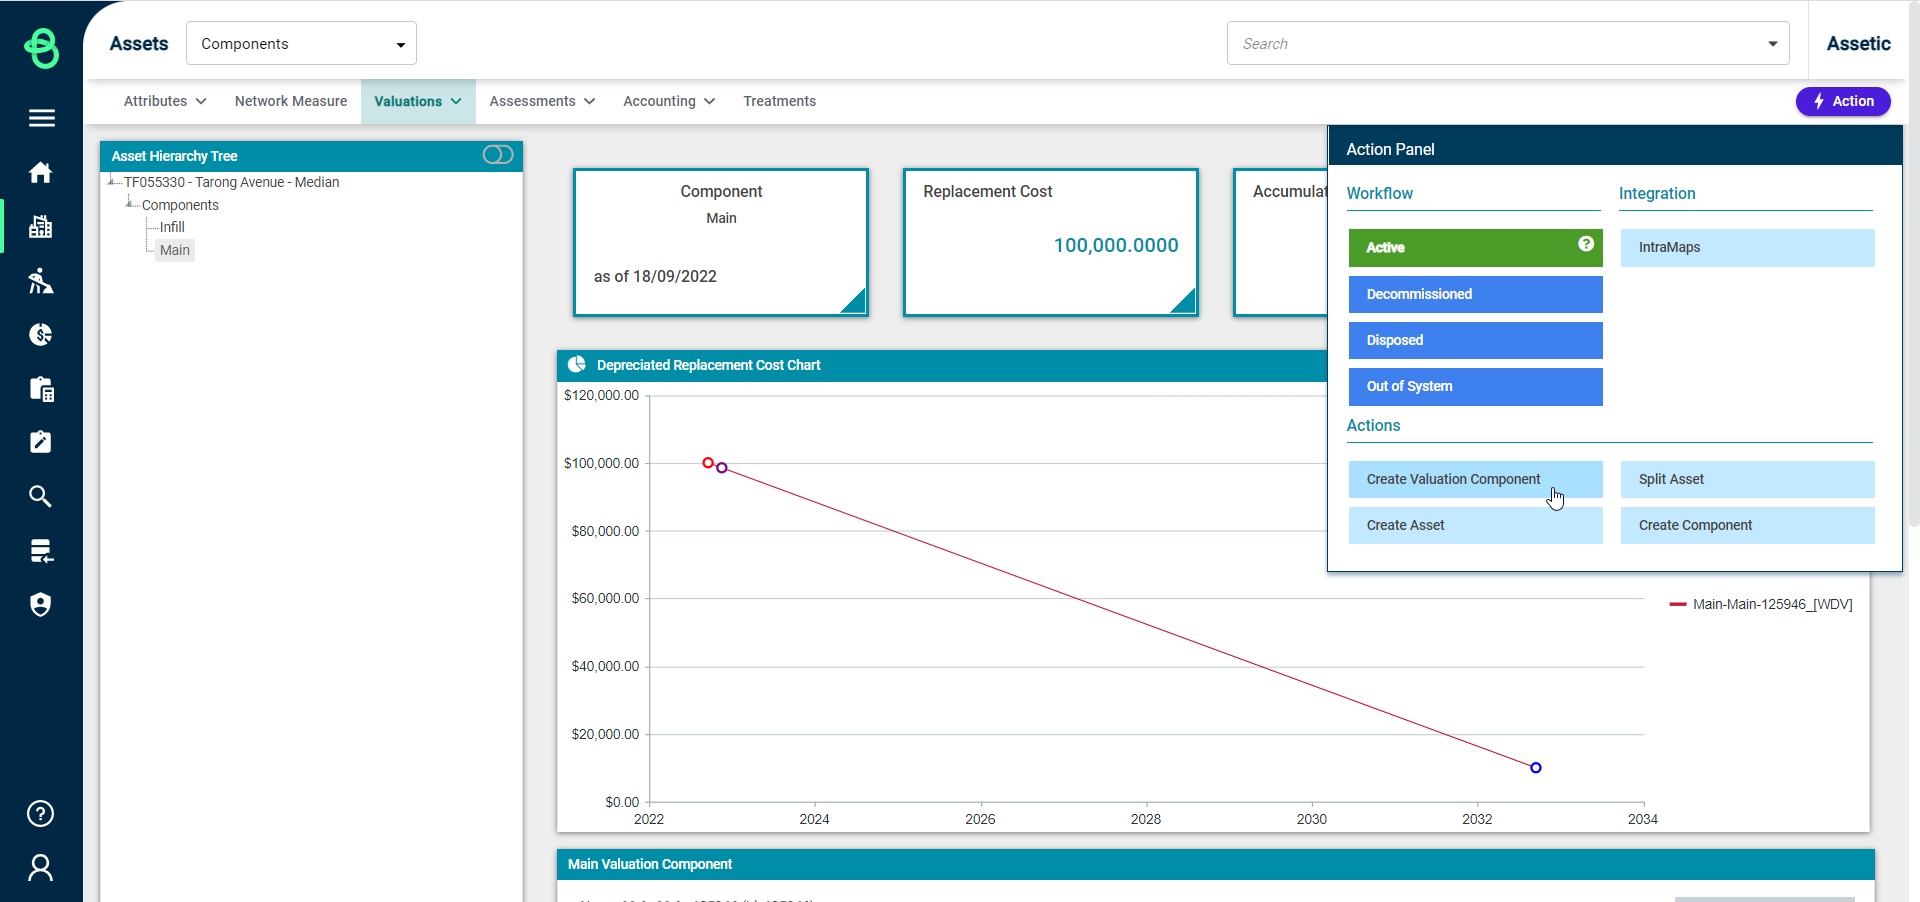
Select 'Create Valuation Component' via the Actions menu to create a CapEx valuation record:
The following screen becomes visible:
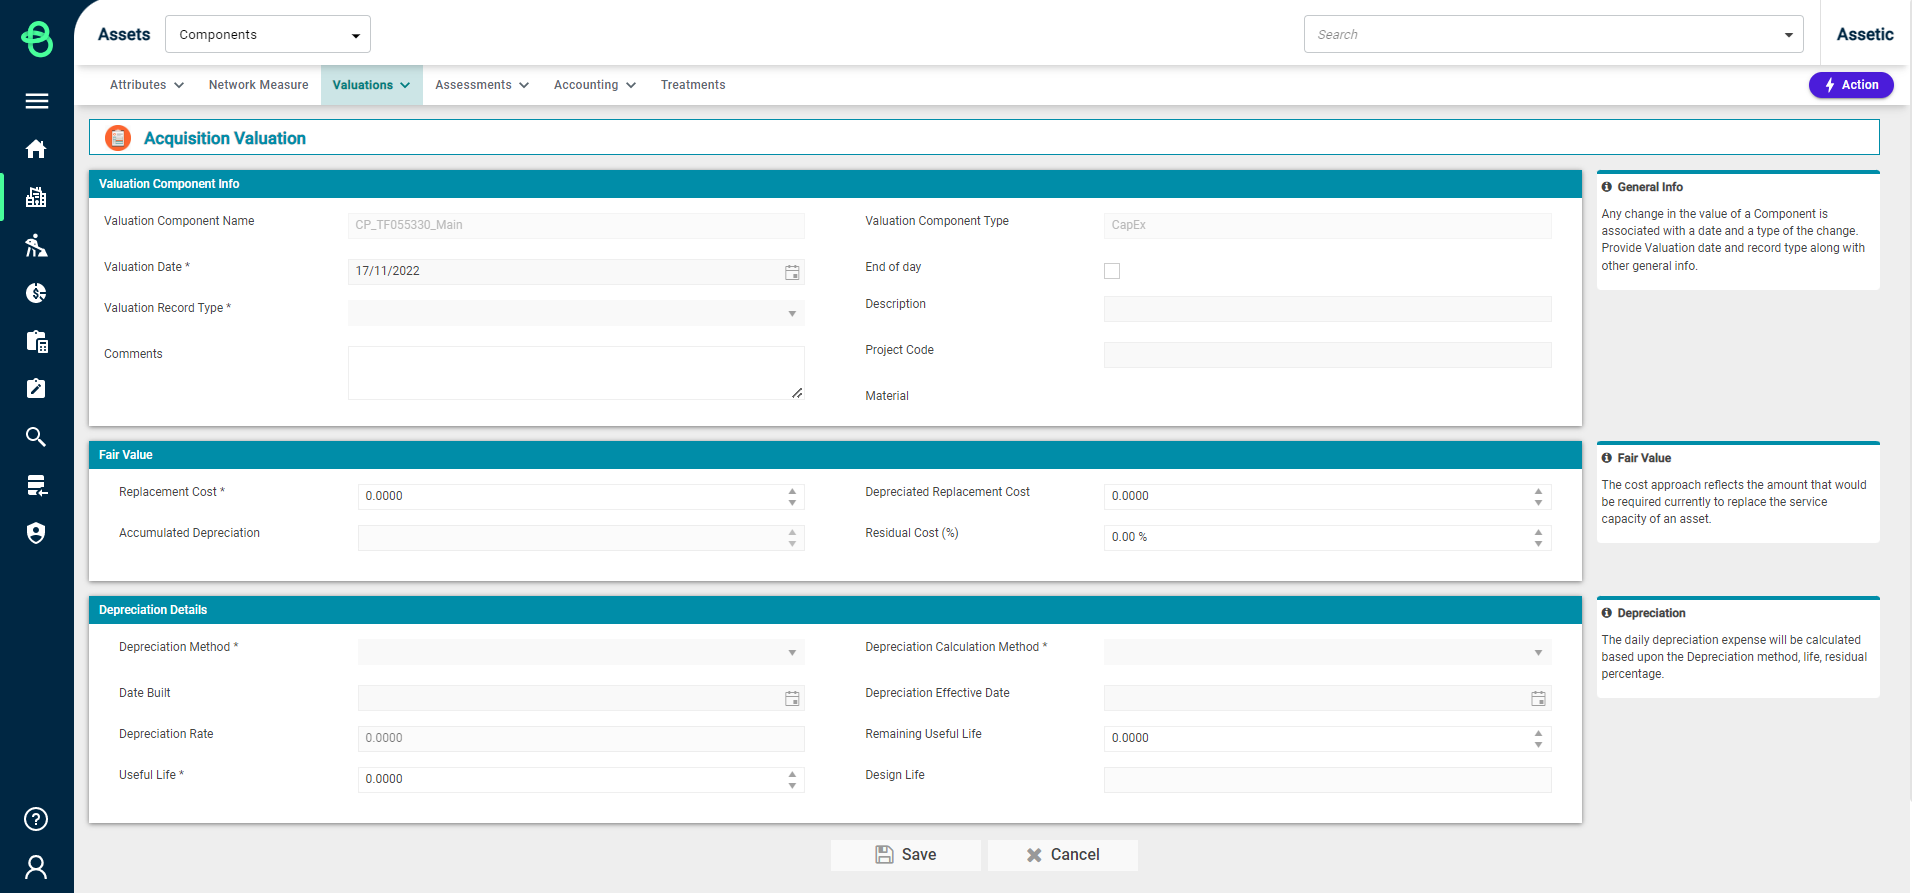
Valuation Component Info:

-
Valuation Component Name: This is not user-configurable and is populated from the parent component reference.
-
Valuation Date*: A mandatory field that is pre-filled with the current date.
-
Valuation Record Type*: This is a mandatory field which allows the user to select a valuation record subtype under Acquisition. For a 'Main' valuation component, the available record subtypes are: Purchase, Opening Value, Found Current Period, Found Prior Period, Gifted, Constructed. For a 'Capex' valuation record, the available record subtypes are: Purchase, Opening Value, Acquisition External Valuation, Found Current Period, and Found Prior Period.
-
Comments: A free-text box for any additional information.
-
Valuation Component Type: This is not user-configurable and is auto-populated from the parent component record. On a component with no valuation component records, the first acquisition will always be Main, and all subsequent entries will be Capex.
-
End of day: This checkbox indicates when the valuation is measured from. If checked, the valuation will be measured from the start of the next day.
-
Description: A free-text field where the description can be stored.
-
Project Code: This can be used to allocate the valuation to a specific project.
-
Material: This field is with the Material from the Parent Component, and cannot be directly modified at the Valuation level.
Fair Value:

-
Replacement Cost: A mandatory numeric field which must be completed by the user.
-
Accumulated Depreciation: This is a non-configurable field and the system calculates this based on the previous inputs.
-
Depreciated Replacement Cost: This is a numeric field where the written value of the component can be stored.
-
Residual Cost (%): This is a numeric field where the estimated percentage resale value of the Asset can be stored.
Depreciation Details:

-
Depreciation Method: This is a mandatory drop-down field that must be completed. Assetic only uses Straight Line (linear) depreciation.
-
Date Built: this is the date when the asset was constructed.
-
Depreciation Rate: Depreciation Rate is not editable and system calculated based on the previous inputs.
-
Useful Life: This is a mandatory field to enter the useful life of an asset.
-
Depreciation Calculation Method: This is a mandatory drop-down field that contains the following options:
-
Prospective (RUL): this is a forward-looking approach to calculating the depreciated replacement cost.
-
Retrospective (UL): this approach is used to calculate depreciated replacement cost if the initial asset value requires updating that will affect the depreciated value.
-
Retrospective (Estimated UL): this is backward-looking with an estimated approach to calculating depreciated replacement cost.
-
Depreciation Effective Date: Depreciation Effective Date is the date from which depreciation is calculated.
-
Remaining Useful Life: This is an optional field to enter the remaining useful life of the Asset.
-
Design Life: Design Life is not editable and is system calculated based on the previous inputs.
Once the above fields are populated with appropriate values, select the 'Save' button and the CapEx record will be successfully added against the Component and will appear in the CapEx Valuation Component box as shown:
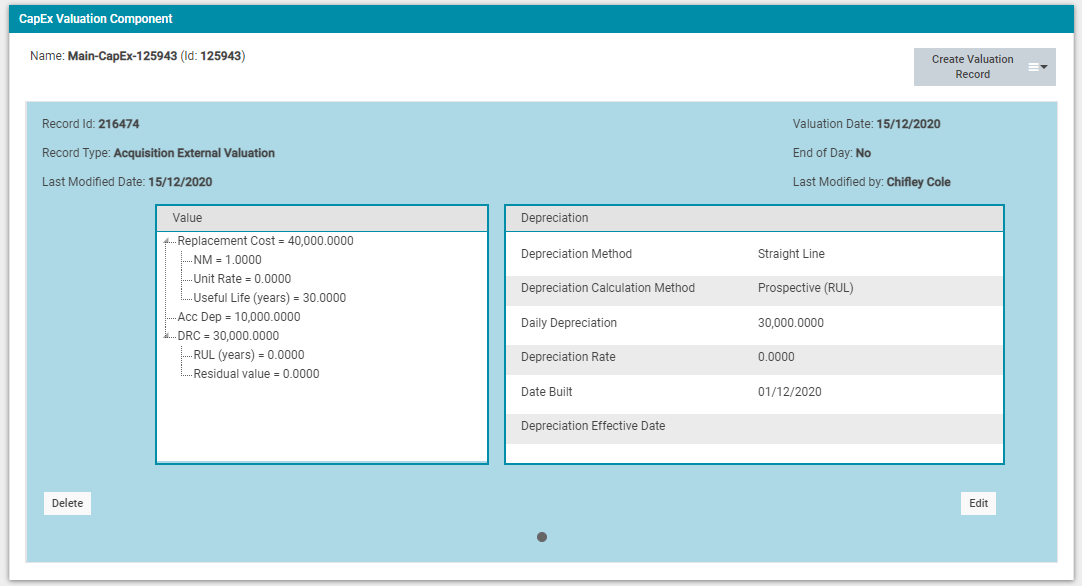
Multiple Valuation Components can be created for a Component.
